Adding a Simple Menu Item
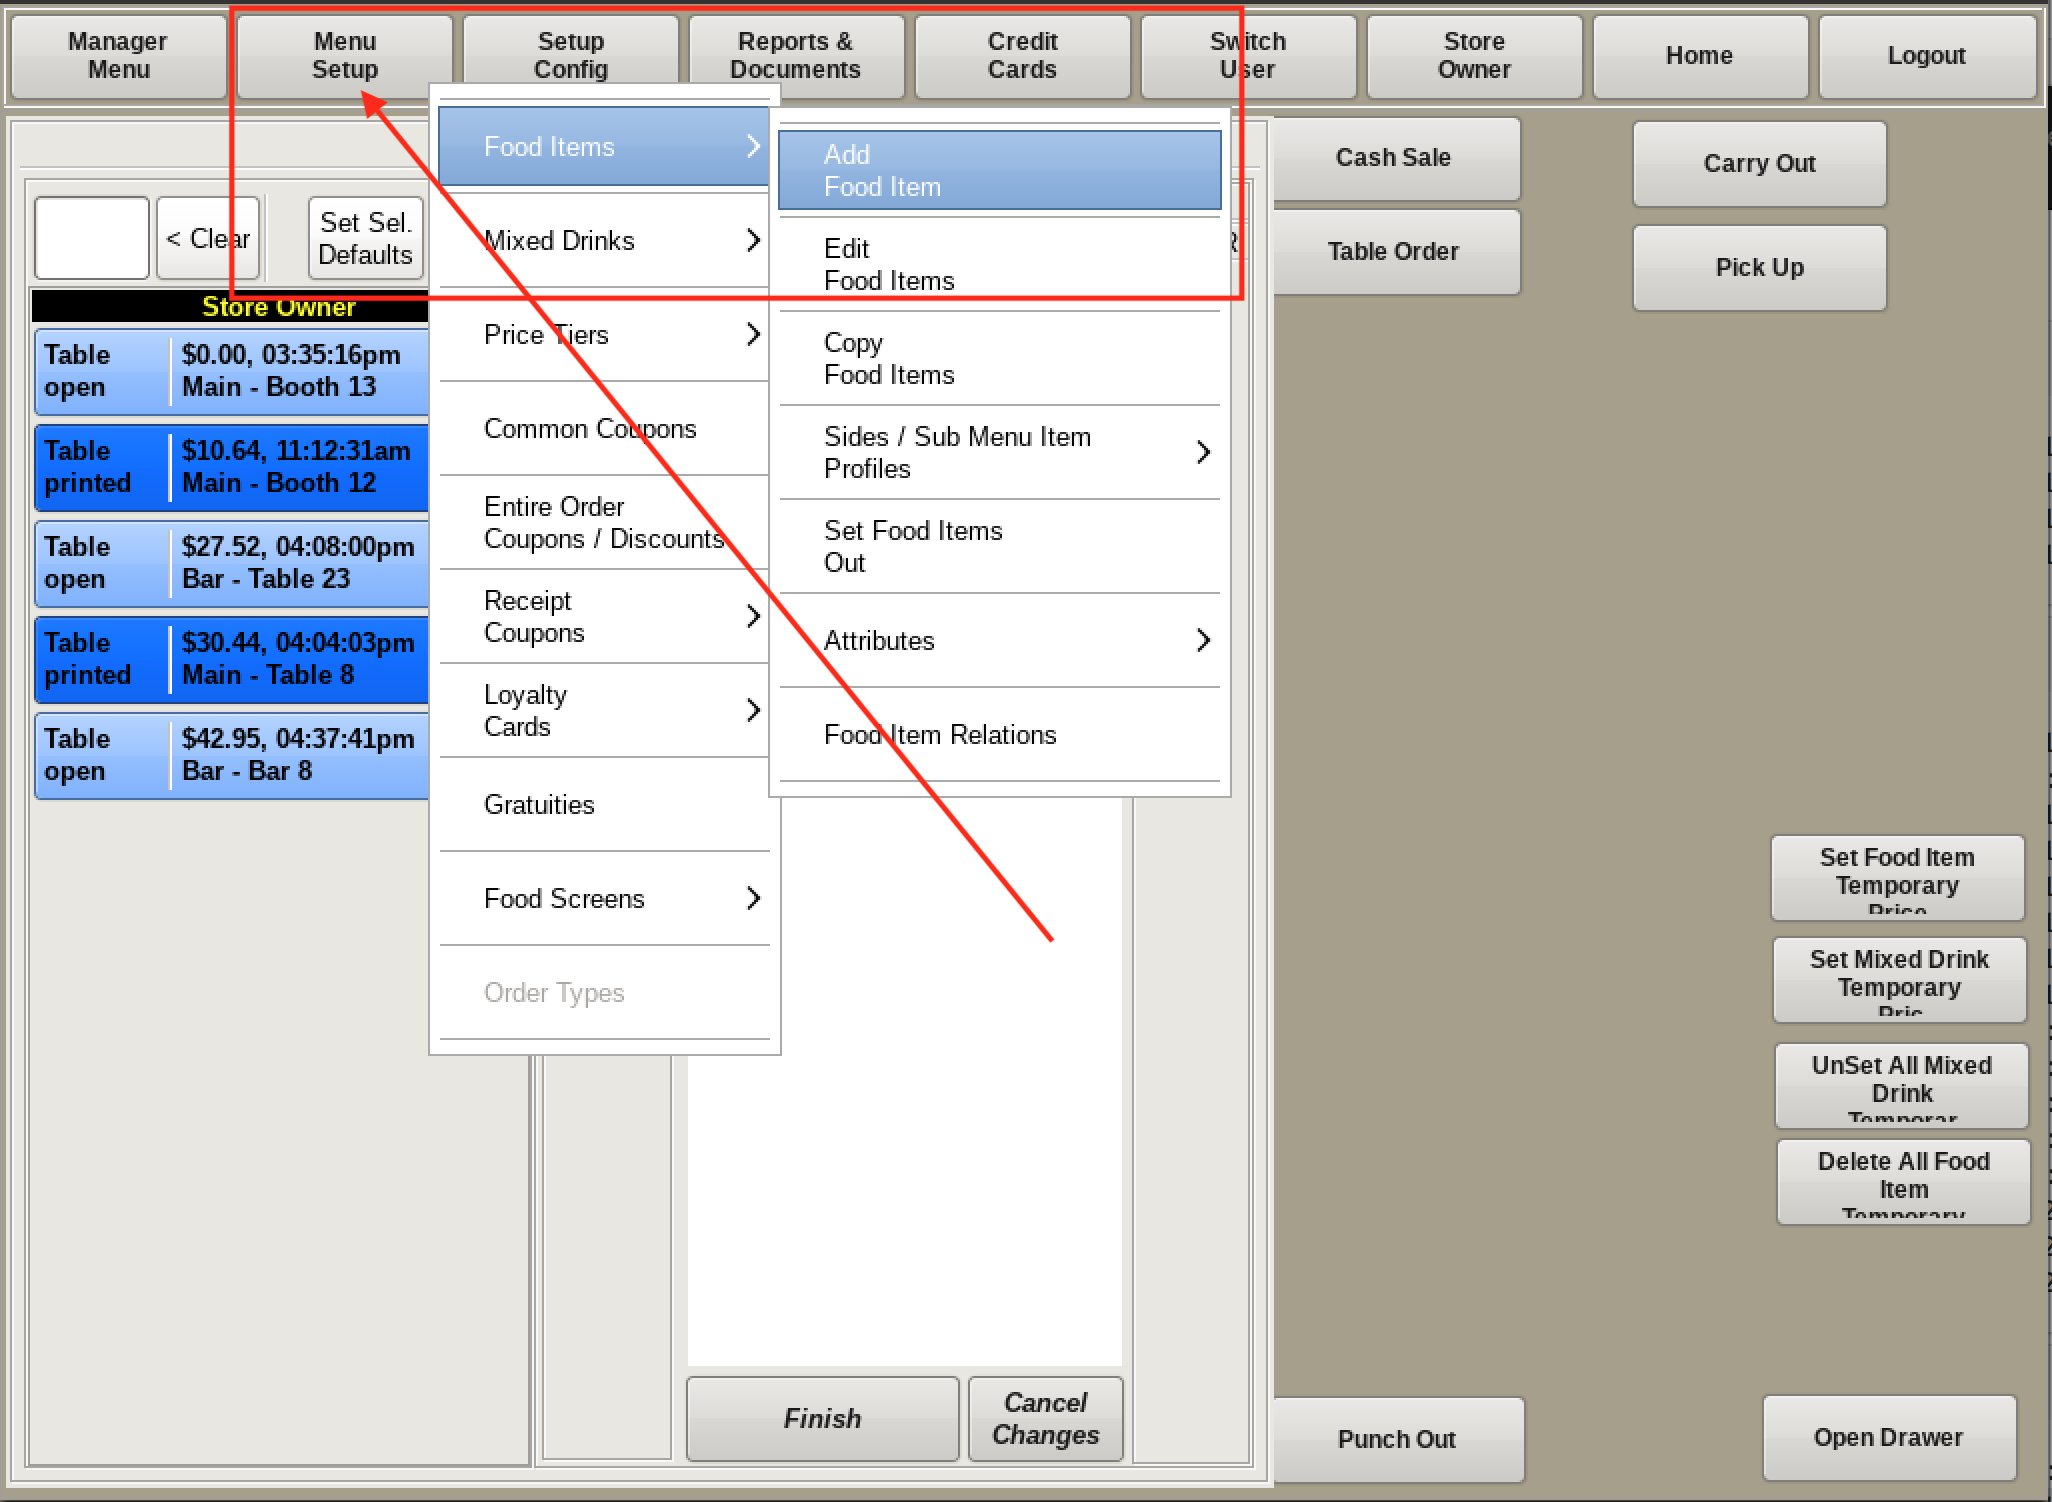
To add a new food item select Menu Setup from the top bar of the home screen. Go to Food Items and choose Add Food Item.
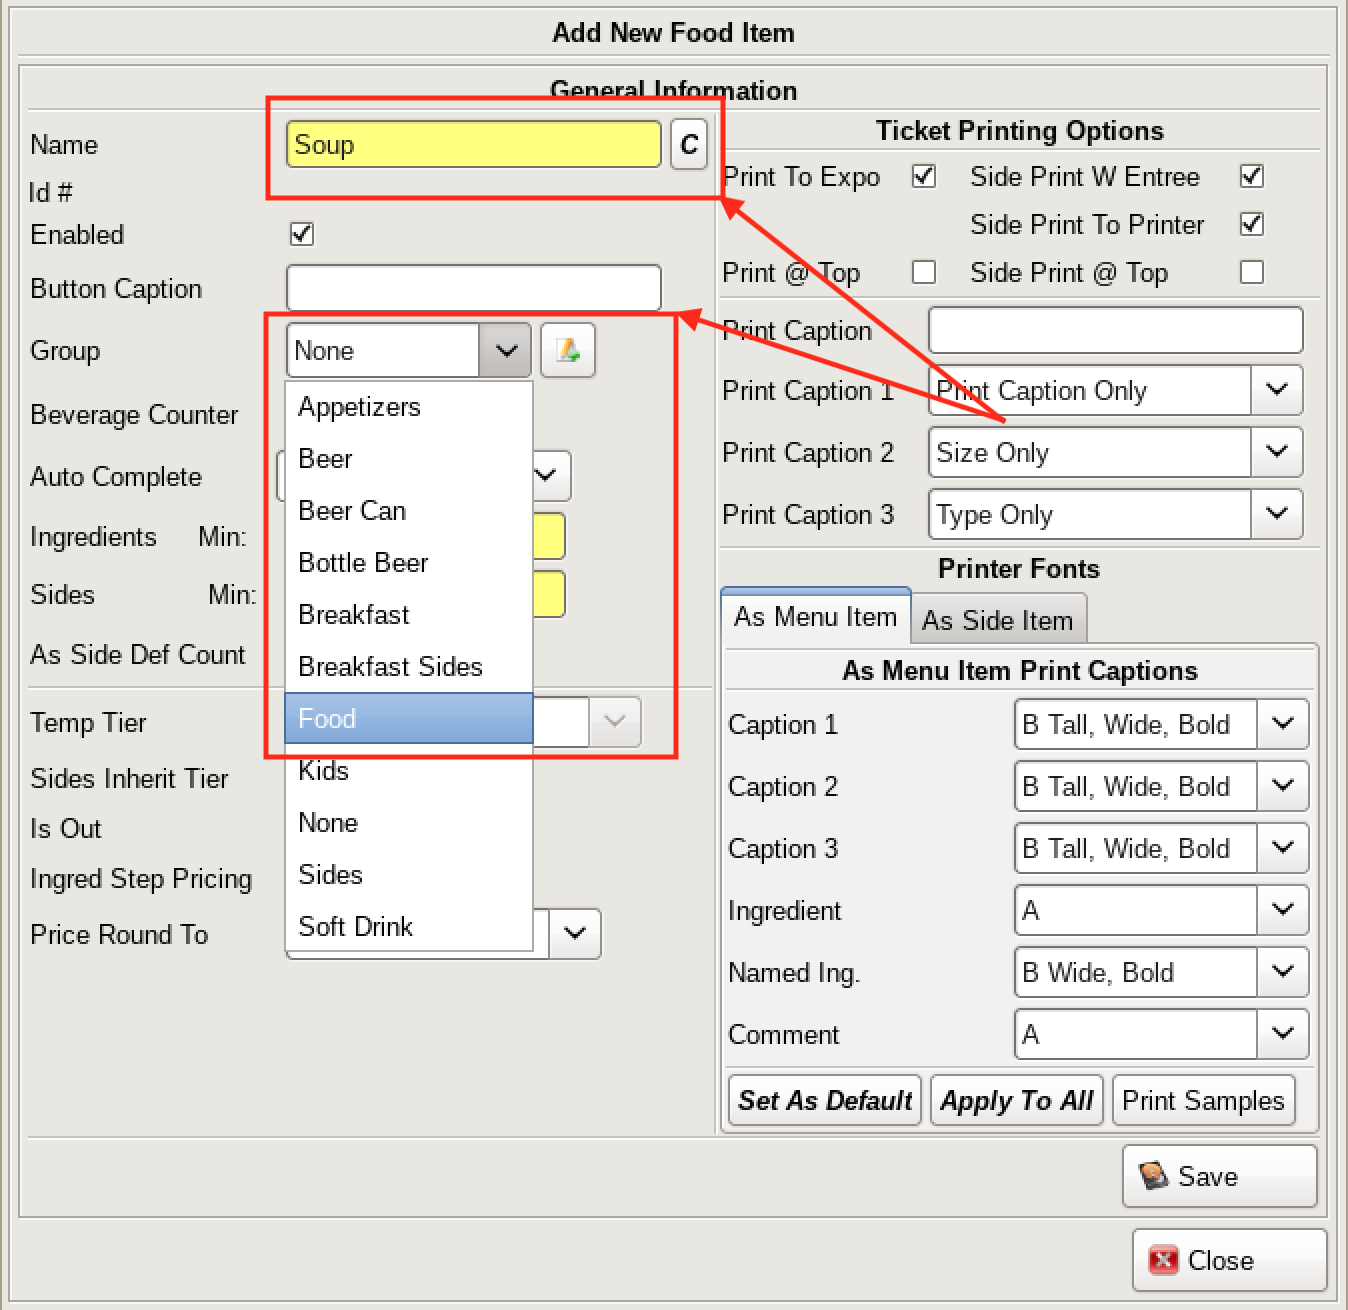
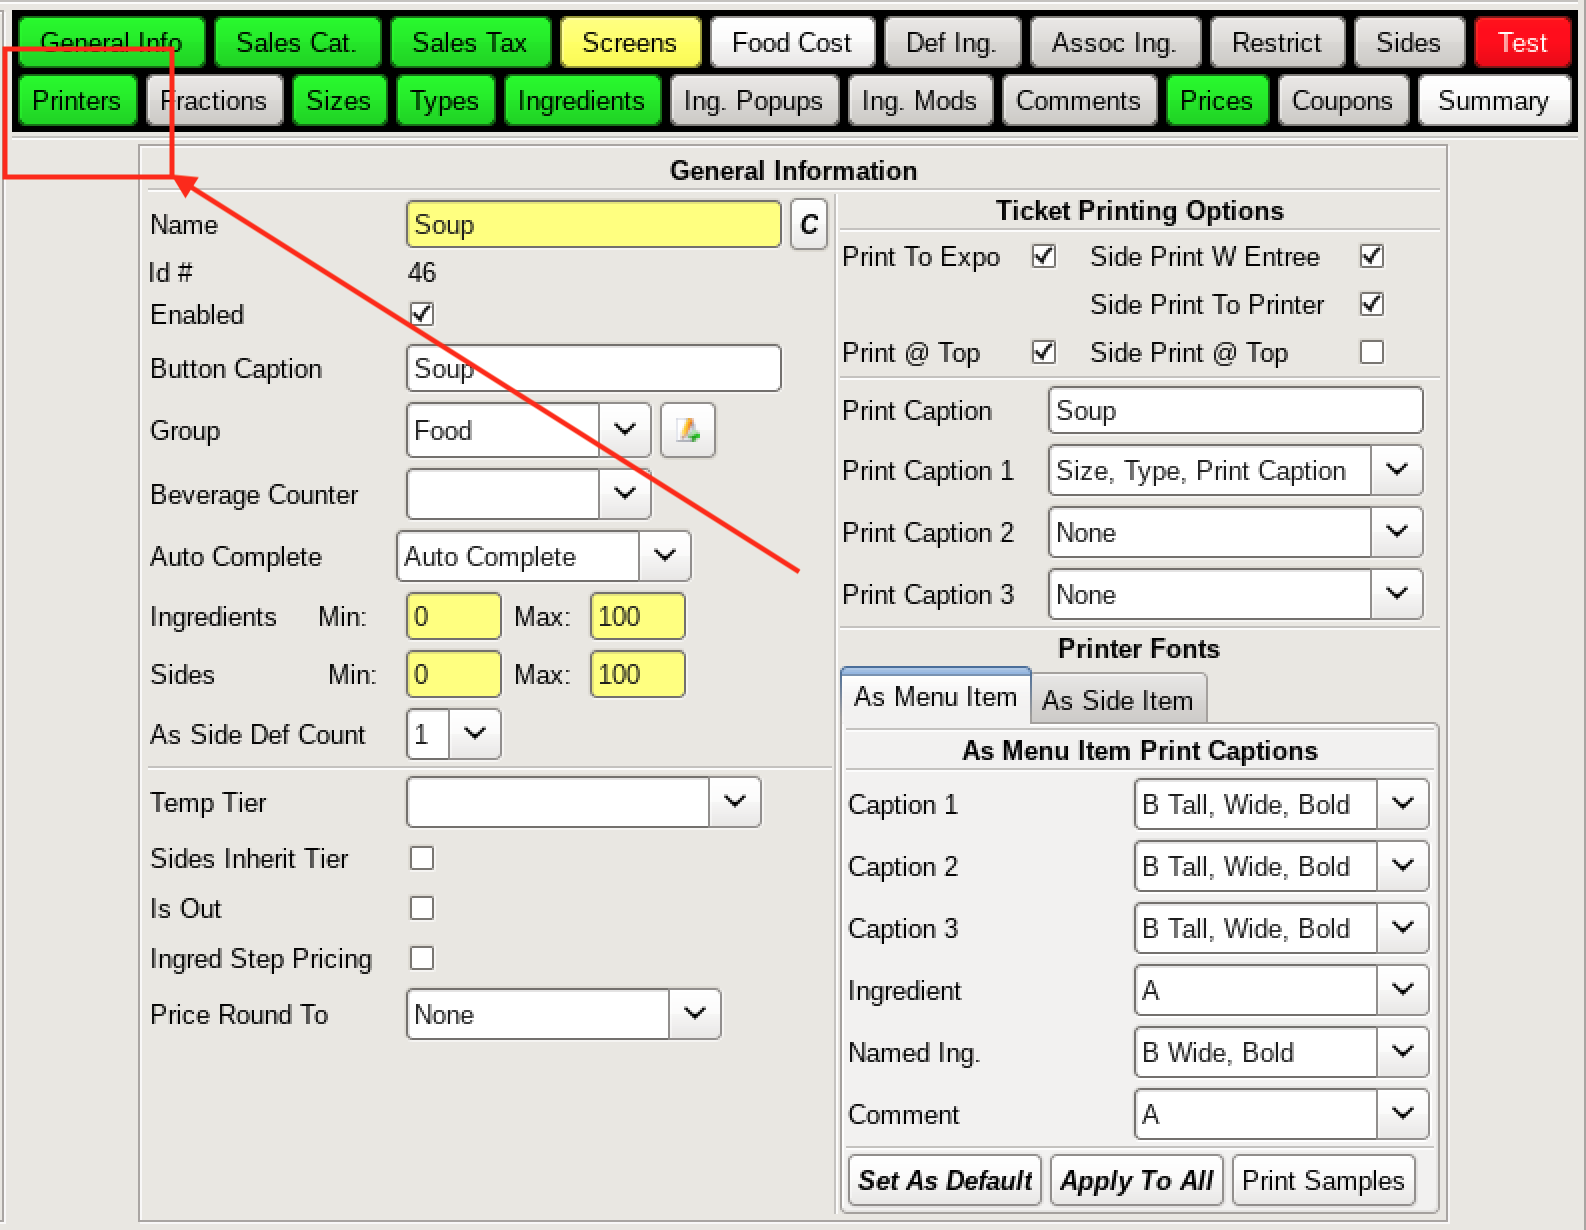
The first field to fill out on this page is the Name text field located in the upper left of the form. For example, Soup.
Next to the Name text field is a button labeled C. Clicking this button will pull up a pop-up window asking if you want to copy the Food Item's name to the print and button caption text fields located within the same window. You can also click and hold the button to avoid seeing the popup window.
Button captions are what will show up on the menu screens during an order in the POS itself.
Print captions are what will show up on the ticket that is printed for an order. In both cases the captions are used to identify which food item we are dealing with.
Under the Button Captions text field is the Group dropdown box. The Group dropdown box is used to identify what kind of food item we are dealing with.
If you don't have any Groups set up at this point, you will need to create one, by selecting the button next to the Group dropdown box to open your list of Groups.
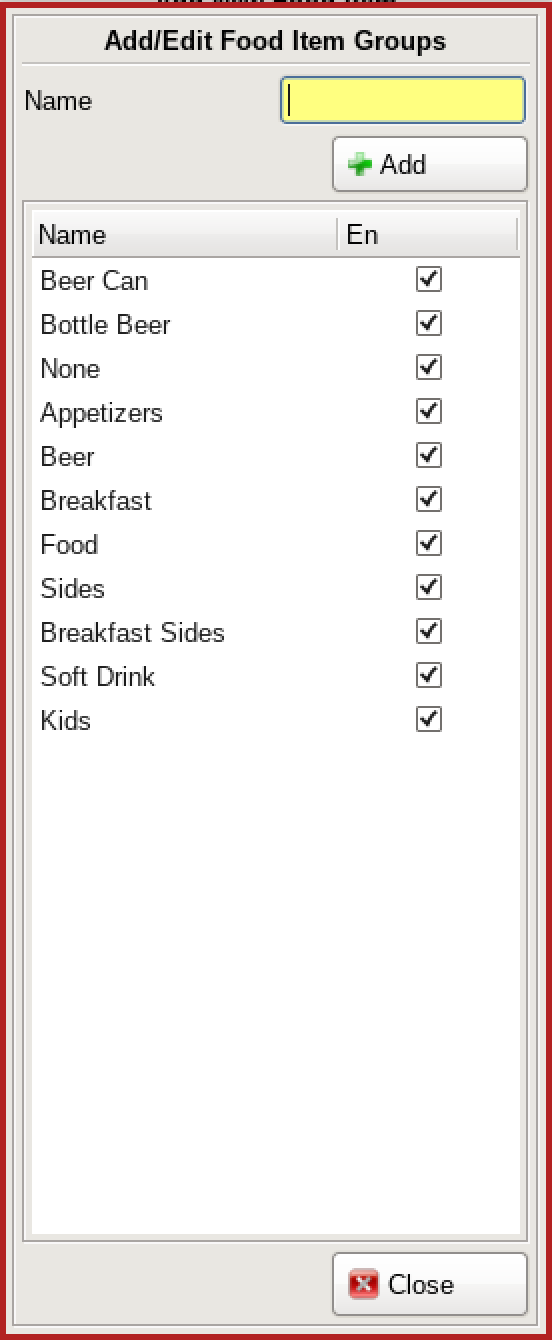
Now you can simply add new groups or enable/disable existing ones. Click Add.
After closing the Item Groups window we can now select the Group from the dropdown box and select Save from the bottom right of the screen.
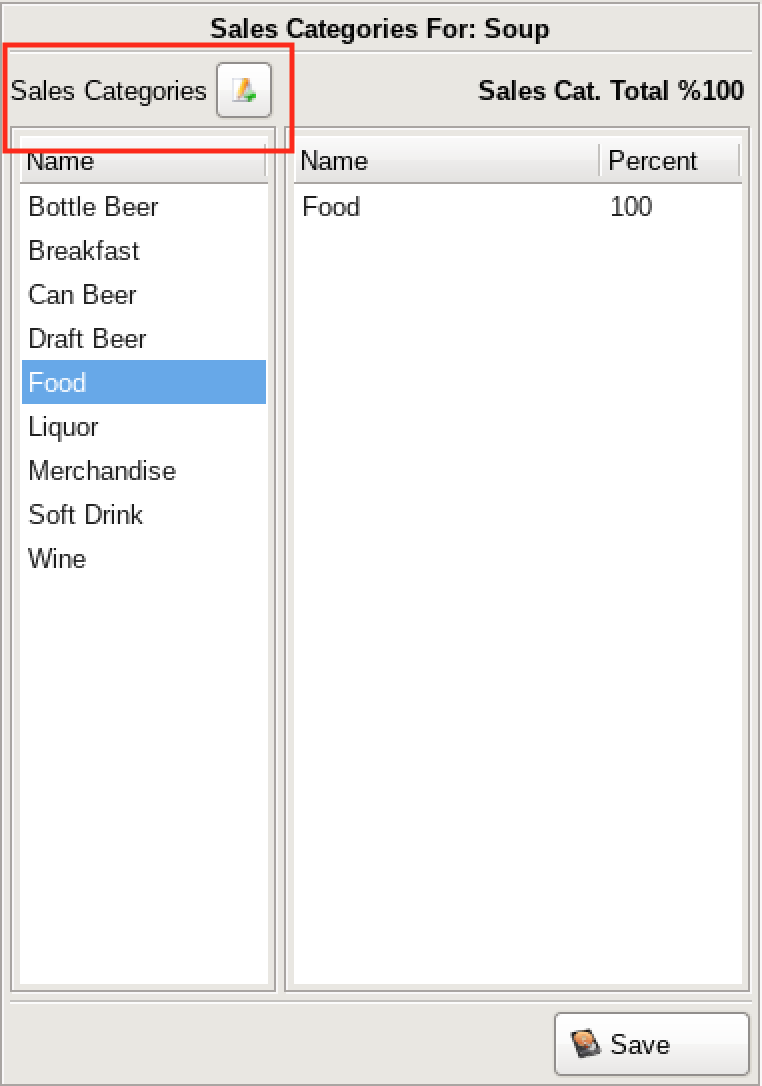
This will bring you to a menu to select the Sales Category for the food item you are creating. Often the sales category will correspond with the group an item is assigned to.
If the desired category does not yet exist, select the Add/Edit button near the top of the form. You can select multiple categories per item, as long as the total percentage at the top right reads 100%.
When satisfied, select Save from the bottom right to move on to the tax rates form.
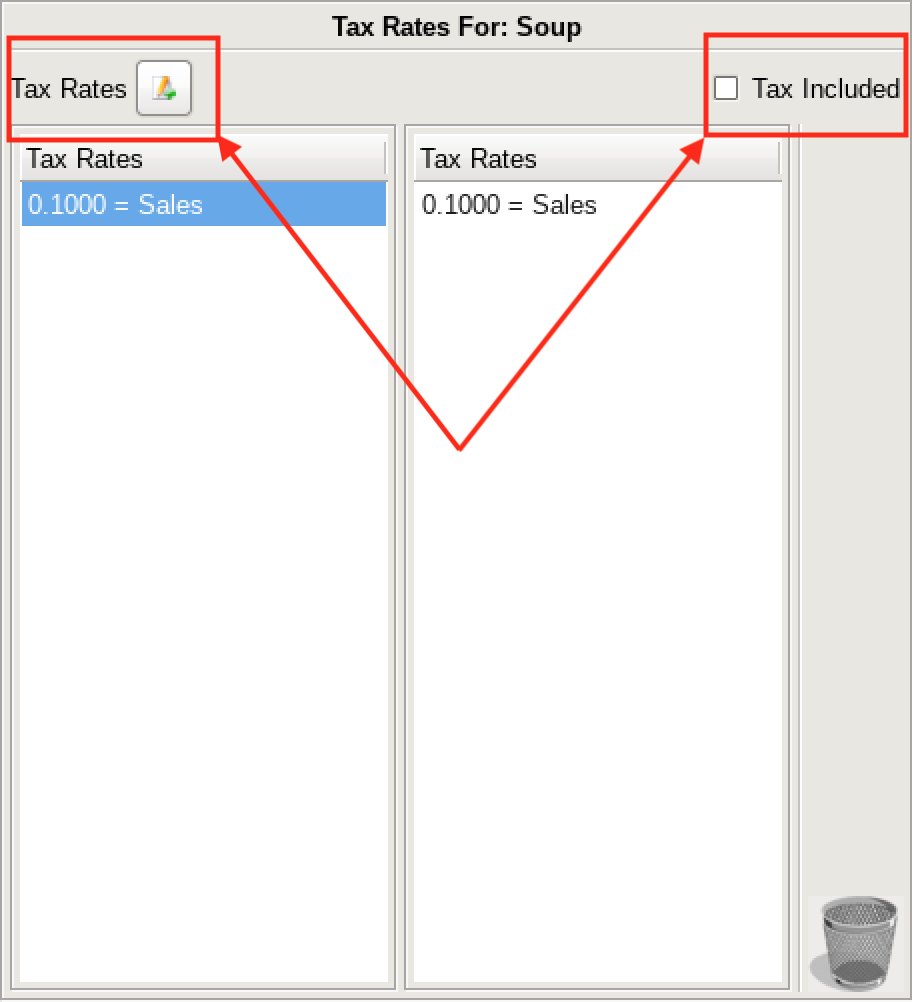
Here you select the Tax Rates that are applied to your food item.
On the left you have the available tax rates saved in the POS, on the right are the selected tax rates for this food item.
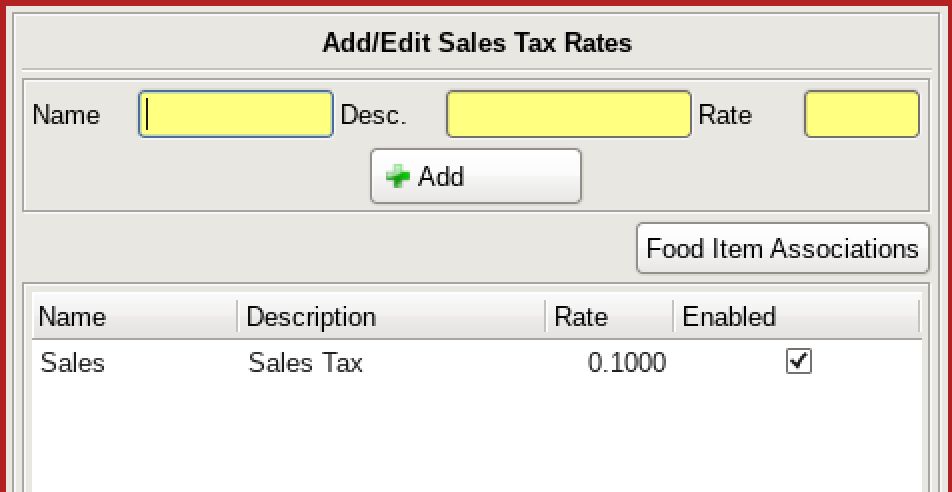
At the top you can add another tax rate, or select if the tax is included in the price.
To add or remove a tax rate from your item, just select or deselect it in the available tax rates list on the left.
This will bring you to the Edit Food Items menu. In this window you can modify many aspects of a Food Item.
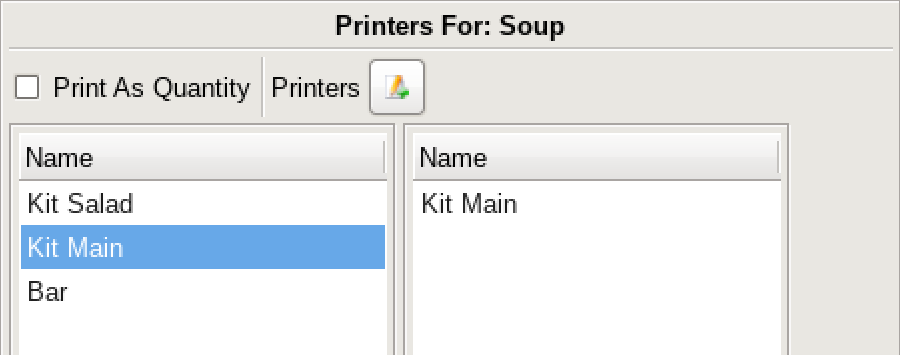
First, you can select what Printers or Printers the food item needs to be printed to. Click on the flashing purple Printers tab. Click on a printer name on the left-hand side of the menu and it will show up in the selected printers list on the right-hand side.
You can also add or edit printer names by using the button just to the right of Printers.
Note: This does not set up a printer, it only adds the name to the list and applies settings.
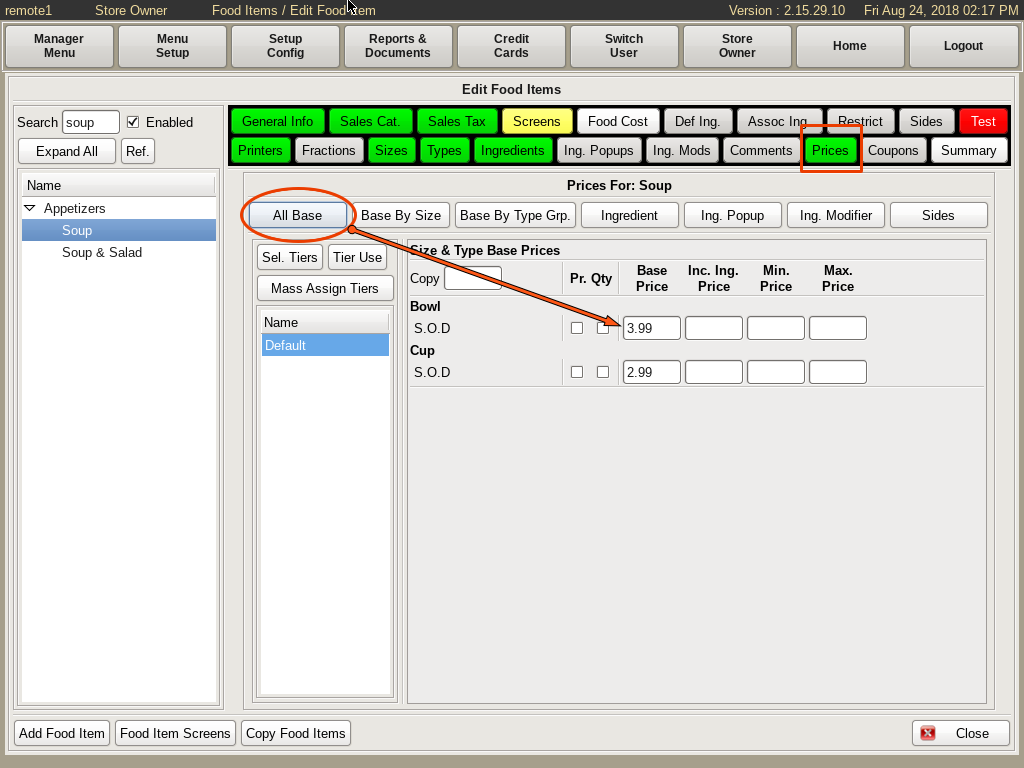
You will now need to Price your Food Item. Click on the Price tab. Then click the All Base button. Fill in the price under the Base Price Field.
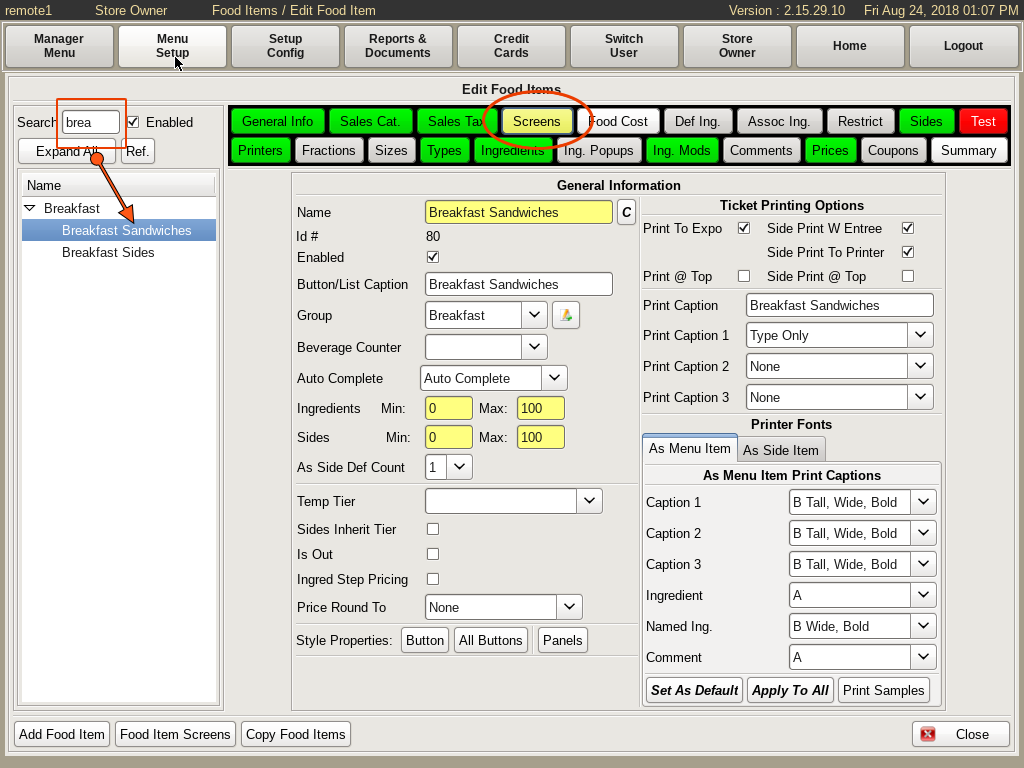
To be able to order the item you added, you need to add a button to the menu. Do this on the Food Screen menu. Select the Screens tab.
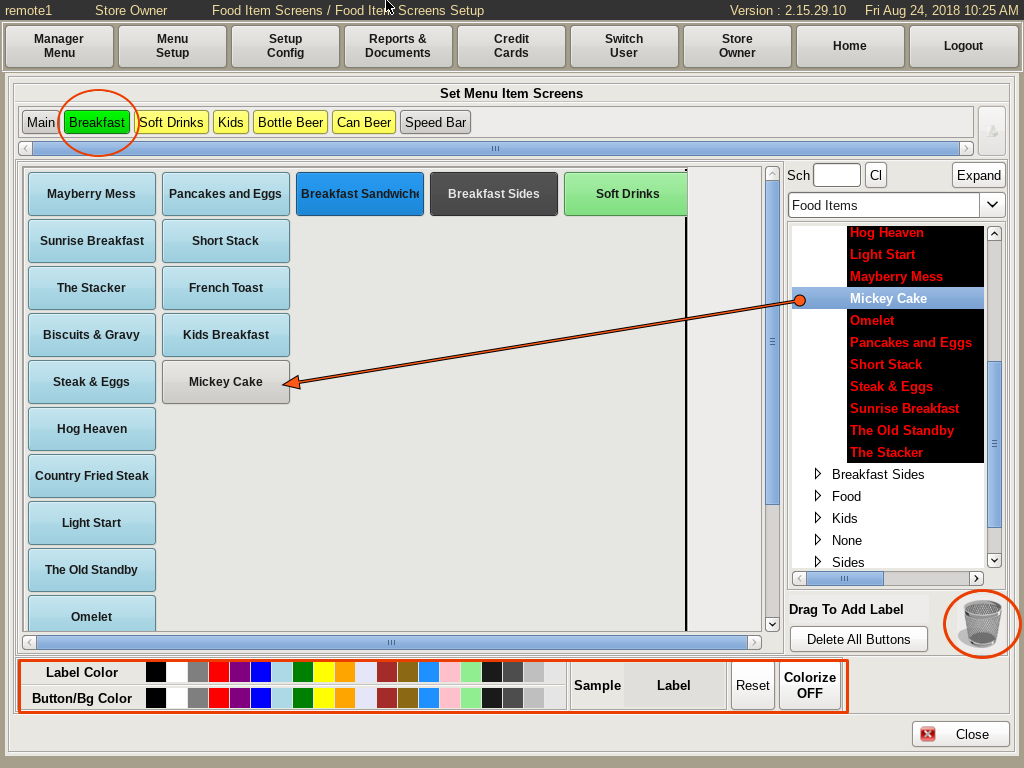
Now drag and drop the Food Item from the list on the right to the Grid on the left. This is where the button will be on your menu when placing orders.